
Uploading photos step by step for perfect pet portraits
Uploading photos for your custom pet portrait should feel simple, but many pet owners face frustration when their submissions get delayed. Up to 40% of first photo submissions contain errors that slow down portrait creation, from blurry images to wrong file formats. This guide walks you through a clear, step-by-step approach to upload photos correctly and receive a portrait you’ll treasure.
Table of Contents
- Prerequisites: What You Need Before Uploading Photos
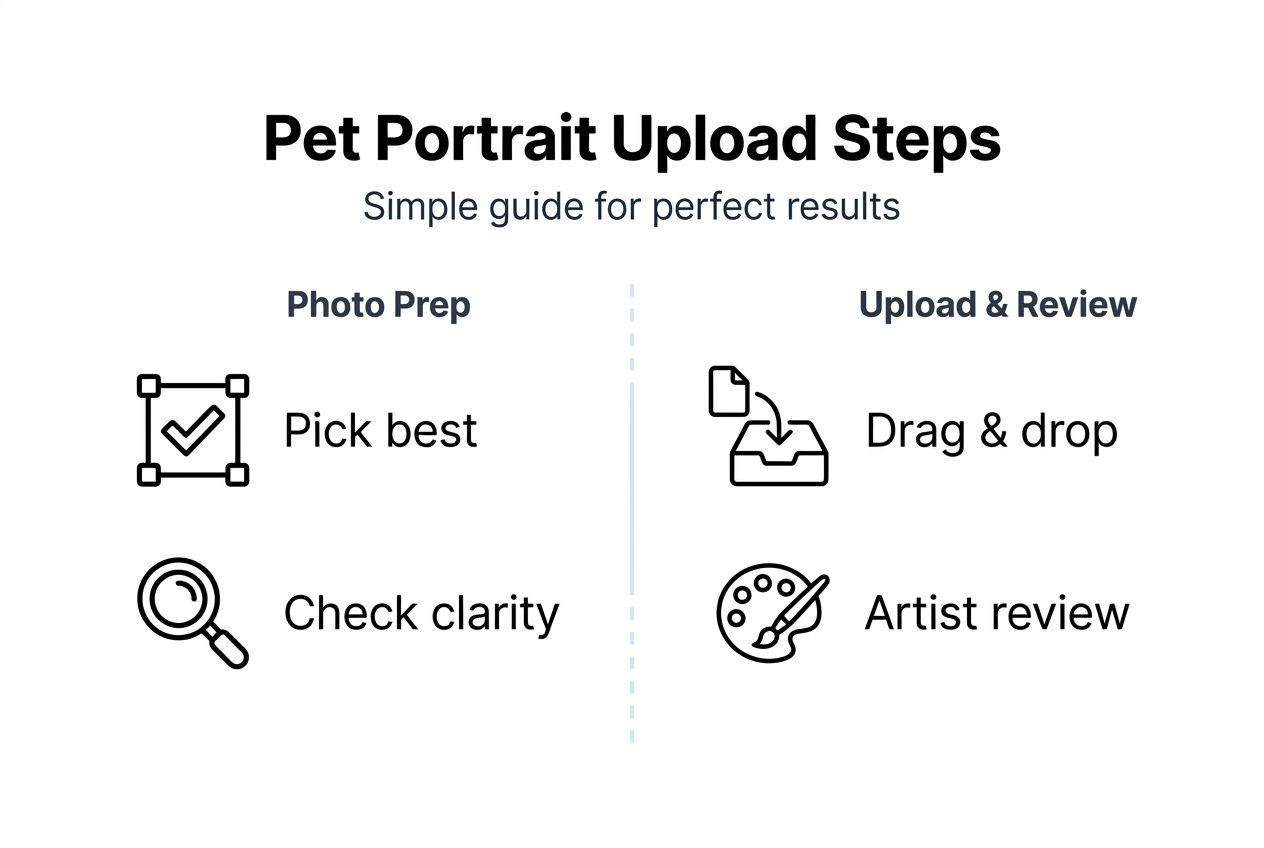
- Step 1: Choose The Right Photos Of Your Pet
- Step 2: Prepare Your Photos For Upload
- Step 3: Upload Photos Using The Website’s Upload System
- Common Mistakes And How To Fix Them
- Expected Timelines And Outcomes After Upload
- Discover Custom Pet Portraits With The Family Portrait Company
- Uploading Photos Step By Step For Custom Pet Portraits: FAQs
Key takeaways
| Point | Details |
|---|---|
| Photo preparation matters | Select high-resolution images with clear lighting, proper file formats, and focused details of your pet’s eyes and fur. |
| Common upload errors | Blurry photos, incorrect file sizes, and distracting backgrounds account for most submission delays. |
| Technical requirements | You need stable internet, accepted file formats like JPG or PNG, and files under 10 MB for smooth uploads. |
| Timeline expectations | Most commissioned pet portraits are delivered within 2 to 6 weeks with satisfaction rates exceeding 85%. |
| Support is available | Contact customer service if upload issues persist after following troubleshooting steps. |
Prerequisites: what you need before uploading photos
Before you start the upload process, gather the right tools and knowledge to avoid delays. You need a digital camera or smartphone capable of capturing high-resolution photos. Most portrait websites support JPG, PNG, and GIF formats, with file size limits typically around 10 MB.
A stable internet connection ensures smooth uploading without interruptions. Familiarising yourself with basic photo quality criteria improves your submission success rate significantly. Access to the website’s dedicated photo upload portal is essential, and basic photo editing tools can help, though they’re optional.
Photo guidelines often specify no human interaction visible, with pets photographed at their level in calm sitting or standing poses. Understanding these requirements beforehand saves time and frustration.
Key items to prepare:
- High-resolution camera or smartphone
- Stable internet connection for uninterrupted uploads
- Basic knowledge of accepted file formats and size limits
- Optional photo editing software for minor adjustments
- Access to the website’s upload portal
Pro Tip: Before uploading, review the website’s photo preparation guidelines to understand specific requirements. This step prevents common mistakes and speeds up the entire commissioning process. Many platforms offer photo booth experience tips that apply equally to pet portrait submissions. Following the portrait approval workflow ensures you’re ready for each stage.
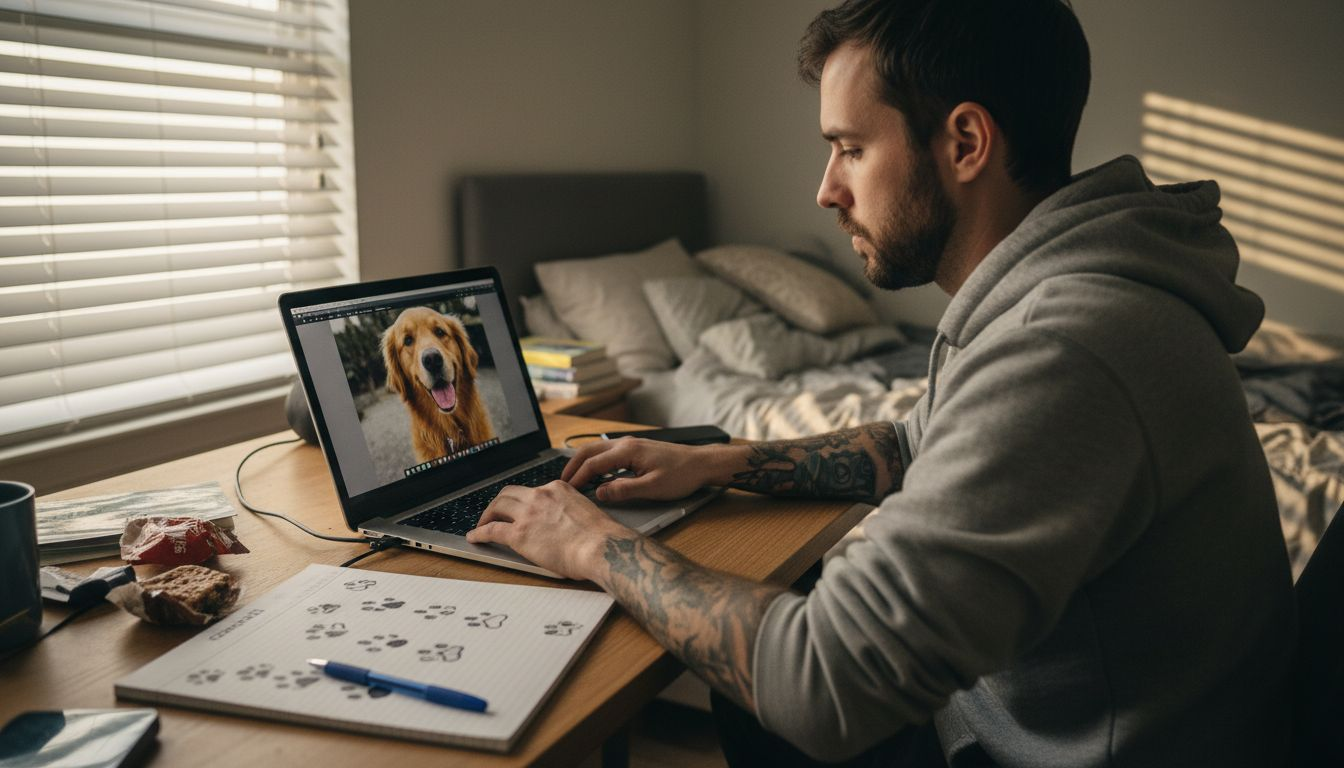
Step 1: choose the right photos of your pet
Selecting photos that capture your pet’s personality makes all the difference in your final portrait. Position yourself at your pet’s eye level to create engaging, characterful images. Select photos with clear pet details where eyes, fur markings, and expressions are visible and focused.
Use photos taken in even, natural lighting. Overcast days work brilliantly because they reduce harsh shadows that can obscure facial features. Ensure your pet’s eyes, fur patterns, and expression stand out clearly.
Choose calm poses where your pet faces the camera directly or at a slight angle. This approach showcases their character without distraction. Avoid photos with other pets, people, or busy background elements that pull focus away from your companion.
Ideal photo characteristics:
- Pet photographed at eye level for personality capture
- Even, natural lighting with minimal shadows
- Clear visibility of eyes, fur markings, and facial expression
- Calm, focused pose facing the camera
- Clean background without distracting elements
Pro Tip: Take multiple photos during a calm moment when your pet is relaxed. Natural light from a window works wonderfully for indoor shots. Review best pet photo tips to understand composition principles that elevate your images. Professional pet photo tips for perfect portraits can transform ordinary snapshots into portrait-worthy images.
Step 2: prepare your photos for upload
Once you’ve selected your favourite photos, technical preparation ensures they meet upload requirements. Resize photos to stay under the file size limit, typically 10 MB, to guarantee upload success. Convert images to accepted formats such as JPG or PNG if needed.
Maintain photo resolution at least 300 dpi for print clarity. This specification ensures your portrait looks sharp whether displayed digitally or printed on canvas. Save backup copies before editing to preserve original files.
Follow these preparation steps:
- Check file size and compress if necessary whilst maintaining quality
- Convert to JPG or PNG format if your photo uses a different file type
- Verify resolution meets minimum 300 dpi for crisp print output
- Optionally crop to focus on your pet’s face and remove distractions
- Adjust brightness or contrast if needed using basic editing software
- Save edited versions separately to keep originals intact
Using portrait photo preparation techniques ensures your images meet professional standards. Understanding photo preparation techniques used in professional settings can elevate your submission quality. Review how to prepare portrait photos for custom pet art for detailed guidance on optimising images before upload.
Step 3: upload photos using the website’s upload system
Navigating the upload interface correctly prevents frustrating technical errors. Most websites offer drag-and-drop or file selector interfaces for easy photo submission. Upload up to 5 photos at once when the platform allows, giving the artist multiple options to work from.
Wait for upload confirmation messages before navigating away from the page. Closing your browser too soon can cause failed uploads that waste time. Avoid interruptions such as unstable internet connections or browser crashes during the process.
Follow these upload steps:
- Navigate to the website’s dedicated photo upload portal
- Select drag-and-drop or click the file selector button
- Choose your prepared photos from your device storage
- Monitor the upload progress bar until completion
- Wait for confirmation message before closing the browser tab
- Note any reference numbers or upload IDs provided
Stable internet and patient uploading improve success rates by 20% compared to rushed manual selection. This small investment of time prevents major headaches later.
Pro Tip: Upload during off-peak hours when internet traffic is lower for faster, more reliable transfers. If uploads fail repeatedly, try a different browser or clear your cache. Understanding how to order custom portraits streamlines the entire process from photo selection to final approval. Review pet photo upload steps for platform-specific guidance.
Common mistakes and how to fix them
Recognising frequent errors helps you avoid delays and disappointment. Approximately 30 to 40% of first photo submissions contain one or more common errors including blurry images, incorrect file sizes, or distracting backgrounds. Addressing these issues before submission saves time.
Blurry or low-resolution photos produce unsatisfactory portraits. Retake photos with better focus or use photo editing tools to sharpen details slightly. File size or format mismatches cause upload failures, so convert formats and resize accordingly before attempting upload again.
Distracting backgrounds or additional pets and people reduce portrait focus. Crop photos to centre your pet or select clearer images from your collection. Avoid incomplete uploads by maintaining a stable internet connection throughout the entire process.
Common issues and solutions:
- Blurry photos: Retake with proper focus or use sharpening tools sparingly
- Wrong file format: Convert to JPG or PNG using free online converters
- File too large: Compress image whilst maintaining quality above 300 dpi
- Distracting backgrounds: Crop tightly or select photos with plain backgrounds
- Upload interruptions: Ensure stable internet and avoid closing browser prematurely
Contact website support if persistent technical issues occur despite following these fixes. Most platforms offer helpful customer service to resolve upload problems quickly.
“Taking a few extra minutes to review photo quality before uploading prevents the majority of delays in portrait commissioning. Clear images with proper lighting and focus produce the best artistic results.”
Following the ordering checklist to reduce revisions minimises back-and-forth communication. Understanding photo etiquette tips helps you submit professional-quality images that artists appreciate.
Expected timelines and outcomes after upload
Understanding the commissioning timeline helps manage expectations and reduces anxiety. Most commissioned pet portraits are delivered within 2 to 6 weeks from confirmed photo upload and booking, with customer satisfaction rates exceeding 85%.
Artists may request clearer photos or adjustments during the review process. Prompt communication speeds completion significantly. Final payment is typically required after you approve near-final artwork mockups, ensuring you’re delighted before the portrait is finalised.
The timeline varies slightly based on artist workload and portrait complexity. Detailed portraits with intricate fur patterns or multiple pets naturally take longer than simpler compositions.
| Stage | Typical Duration | Your Action Required |
|---|---|---|
| Photo review | 1 to 3 days | Respond to any artist queries promptly |
| Sketch approval | 3 to 7 days | Review and approve initial sketch |
| Portrait creation | 1 to 4 weeks | Wait patiently, artist will update progress |
| Final approval | 2 to 5 days | Review finished artwork and confirm satisfaction |
| Delivery | 3 to 7 days | Await shipment or digital file delivery |
Customer satisfaction exceeds 85% when following recommended upload and approval guidelines. This high success rate demonstrates the value of proper photo preparation and clear communication.
Understanding the pet portrait timeline steps helps you plan gift-giving or home decor projects. Mastering the custom portrait ordering process ensures smooth commissioning from start to finish.
Discover custom pet portraits with the Family Portrait Company
Now that you understand how to upload photos properly, bring your vision to life with the Family Portrait Company. They offer expertly crafted custom pet portraits from your photos starting at just £24, making professional artwork accessible to every pet lover.
Their streamlined upload and commission system embraces the step-by-step guidance from this article, ensuring a smooth experience from photo selection to final delivery. Helpful resources and dedicated support assist you throughout the commissioning process. Visit their pet portrait page to start your order confidently and create a lasting keepsake that celebrates your beloved companion. Understanding how to order custom portraits makes the entire process straightforward and enjoyable.
Uploading photos step by step for custom pet portraits: FAQs
What file size and format limits apply to photo uploads?
Most portrait websites accept JPG, PNG, and GIF formats with file size limits around 10 MB per image. Maintaining resolution at 300 dpi ensures print quality whilst staying within size constraints.
Can I use smartphone photos for my pet portrait?
Yes, modern smartphones capture high-resolution images suitable for portraits. Ensure good lighting, clear focus on your pet’s features, and avoid digital zoom which reduces quality.
How do I handle multiple pets in one photo?
Upload separate photos of each pet to give the artist flexibility in composition. If you want multiple pets in one portrait, select a photo where all animals are clearly visible and well-lit.
What should I do if my upload fails repeatedly?
Check your internet connection stability and try a different browser. Clear your browser cache, reduce file size if needed, and contact customer support if issues persist after troubleshooting.
How will the artist communicate with me after upload?
Most artists send email confirmation within 1 to 3 days of upload, requesting clarification if needed. They provide progress updates and mockups for your approval before finalising the portrait.
Recommended
- Step by Step Pet Photo Guide for Custom Portraits – The Family Portrait Companys
- Pet Portrait Timeline Steps for Perfect Family Keepsakes – The Family Portrait Companys
- How to Prepare Portrait Photos for Custom Pet Art – The Family Portrait Companys
- How to Organise Photo Sessions for Pet Portraits at Home – The Family Portrait Companys
- Master the Photo Booth Setup Process for Perfect Events
- How to Buy Original Art Online: A Step-by-Step Guide – The Mansion Press