
Best Pet Photo Tips for Stunning Family Portraits
Family photo walls in British homes often feel incomplete without a vibrant pet portrait. Capturing your pet’s true personality in a photo takes more than a quick snap; finding the right light and creating a relaxed atmosphere are key. With a few clever techniques and an understanding of animal behaviour, you can create portraits that bring warmth and character to your living space. This guide reveals expert advice for making your pet the star of your home decor.
Table of Contents
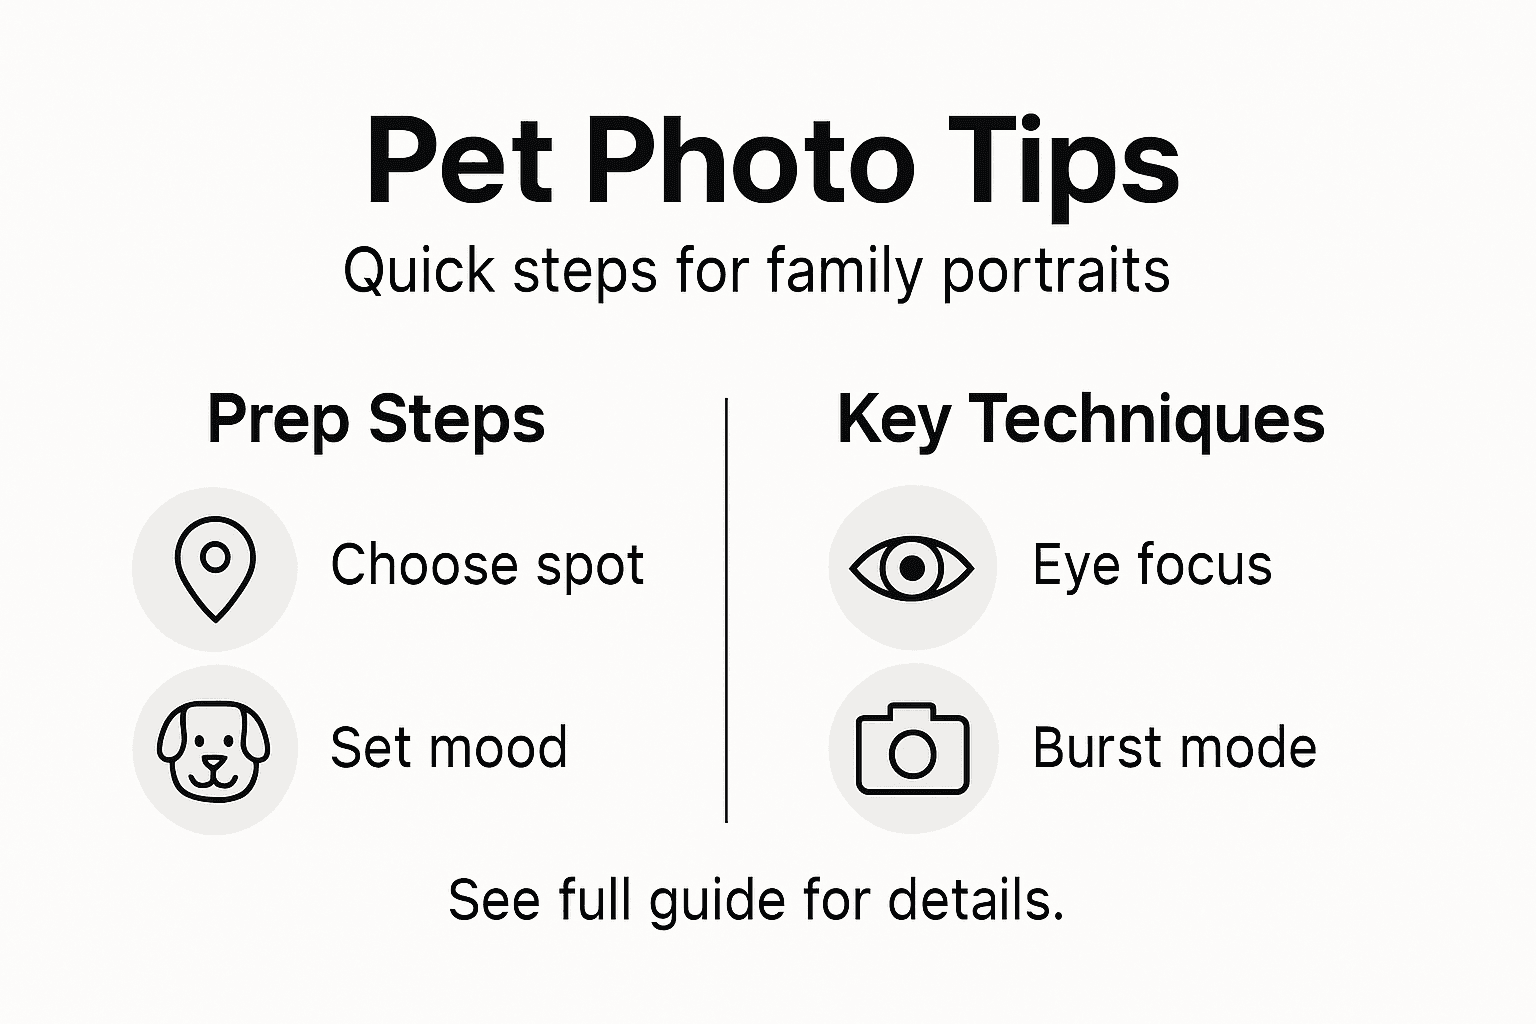
- Step 1: Choose The Ideal Spot And Lighting For Your Pet
- Step 2: Prepare Your Pet And Set The Right Mood
- Step 3: Compose The Shot And Focus On Your Pet’s Eyes
- Step 4: Capture Multiple Moments Using Clever Techniques
- Step 5: Review And Select The Best Photos For Portraits
Quick Summary
| Key Point | Explanation |
|---|---|
| 1. Choose optimal lighting | Natural light during early morning or late afternoon enhances pet portraits significantly by providing a flattering glow. |
| 2. Focus on pet comfort | Ensure your pet feels calm and relaxed to capture genuine expressions, avoiding sudden movements or harsh lighting. |
| 3. Shoot at eye level | Position the camera at your pet’s eye level to create an intimate connection and improve emotional impact in portraits. |
| 4. Use continuous shooting mode | Enabling burst mode increases the chances of capturing perfect moments, resulting in more engaging expressions. |
| 5. Review and select carefully | Rigorously cull and compare images to find those that best represent your pet’s personality and charm for portraits. |
Step 1: Choose the ideal spot and lighting for your pet
Finding the right location and light conditions transforms an ordinary snapshot into a portrait that truly captures your pet’s character. This step forms the foundation of your entire shoot - get it wrong, and even the best camera won’t save your photos. Get it right, and you’re halfway to creating something gallery-worthy.
Start by observing how light moves through your home or garden throughout the day. Morning and late afternoon light offers soft, warm tones that work beautifully for pet portraits, creating that flattering glow that makes fur look lustrous without appearing washed out. If you’re shooting outdoors, an overcast day is genuinely your friend, as cloud cover acts like nature’s softbox. This diffused light prevents harsh shadows across your pet’s face and eliminates the squinting expression that direct sunlight forces. Indoors, position your pet near a window where natural light floods in gently, avoiding direct sun rays that create unflattering contrast.
One crucial consideration is your pet’s comfort and stress level. Animals are sensitive to harsh lighting, and bright flashes can startle or upset them, making it nearly impossible to capture genuine expressions. Skip the flash whenever possible, especially if your pet already seems nervous about the photo session. Choose a calm, familiar location where your pet feels relaxed - whether that’s your living room, garden, or a quiet park they know well. A comfortable pet is an cooperative pet, and you’ll notice the difference immediately in how naturally they pose and interact with you during the shoot.
When scouting your location, look for neutral backgrounds that won’t compete with your pet’s features. A plain wall, garden foliage, or even a simple wooden fence works beautifully. Position your pet so they’re not sitting directly in sunlight or shadow - aim for even lighting across their entire body. If natural light feels insufficient, position a white sheet or reflector opposite your light source to bounce soft light into shadowed areas. This simple technique costs nothing but creates professional-looking results. When preparing your photos for the actual portrait session, ensuring you have good reference images from this well-lit setting gives artists everything they need to create stunning artwork.
Here is a summary comparing natural and artificial lighting for pet portraits:
| Lighting Type | Advantages | Drawbacks |
|---|---|---|
| Natural Light | Flattering, soft tones for fur | Varies with time of day, weather limits |
| Artificial Light | Controlled, usable at any time | Can stress pets, may create harshness |
| Window Light | Gentle, easy to use indoors | Not always available in every room |
| Flash | Fills shadows, usable in darkness | Likely to startle or upset pets |
Professional tip Scout your location at the same time of day you plan to shoot, as light conditions vary dramatically between morning, midday, and evening - this guarantees the lighting you see during planning matches what you’ll get during the actual session.
Step 2: Prepare your pet and set the right mood
Getting your pet mentally and physically ready transforms the photo session from a stressful ordeal into something enjoyable for both of you. A calm, prepared pet naturally displays genuine expressions and cooperative behaviour, which translates directly into better portraits. This step is about creating the right environment and mindset before you even pick up the camera.
Start by letting your pet acclimatise to the session gradually. If you’re shooting indoors, spend a few minutes in the space beforehand, letting your pet sniff around and become familiar with the setup. Avoid sudden movements, loud noises, or frantic energy that might startle them. When you’re ready to begin, approach your pet gently and allow them time to settle before you start capturing images. Some pets need just five minutes, others might need fifteen. Patience at this stage pays dividends in the quality of shots you’ll achieve. Have treats nearby, not just for bribery, but as genuine positive reinforcement that creates pleasant associations with the camera and your attention.
Your own energy matters more than you might realise. Pets are remarkably perceptive, and if you’re feeling stressed or impatient, they’ll pick up on that immediately and mirror your tension back to you. Keep sessions short and rewarding, aiming for 15 to 20 minutes maximum before taking a proper break. This prevents fatigue and keeps your pet engaged. Building trust through patience with your pet allows you to anticipate natural moments rather than forcing awkward poses. Familiar toys, blankets, or items that smell like home can help your pet feel at ease in the shooting space. Some pets respond brilliantly to their favourite toy positioned just behind your camera, which naturally draws their attention and creates alert, engaged expressions. Others prefer a gentle word of encouragement or the presence of a family member nearby. When preparing your photos for custom portrait artwork, having captured images of your pet in this genuinely relaxed state gives artists the best reference material to work from.
Remember that setting the right mood is as much about what you avoid as what you do. Skip the flash if possible, keep background noise to a minimum, and never force your pet into a pose or expression. The best portraits come when your pet is simply being themselves, comfortable and content in your company.
Professional tip Stay calm and composed yourself throughout the session, as your pet will mirror your energy and demeanour, directly influencing how cooperative and comfortable they feel during the shoot.
Step 3: Compose the shot and focus on your pet’s eyes
The eyes make or break a pet portrait. Sharp, engaging eyes create an emotional connection that transforms a simple photograph into something that genuinely moves people. This step is where technical skill meets artistic vision, and getting it right elevates your portraits from ordinary to gallery-worthy.
Start by positioning yourself at your pet’s eye level rather than shooting down from above. This creates intimacy and draws the viewer directly into your pet’s gaze. Once you’re positioned, frame your shot using the rule of thirds, which means placing your pet’s eyes roughly on one of the intersecting lines rather than dead centre. This compositional technique feels more natural and engaging to the human eye. Now comes the critical part: keep the eyes sharp in focus whilst gently blurring the background. This separation makes your pet pop off the page and eliminates distracting elements behind them. Adjust your aperture to achieve this effect. A wider aperture (lower f-number like f2.8 or f4) creates beautiful background blur, whilst a narrower aperture (higher f-number like f8) keeps more of the image sharp. For portraits, err towards the wider side to emphasise those all-important eyes.
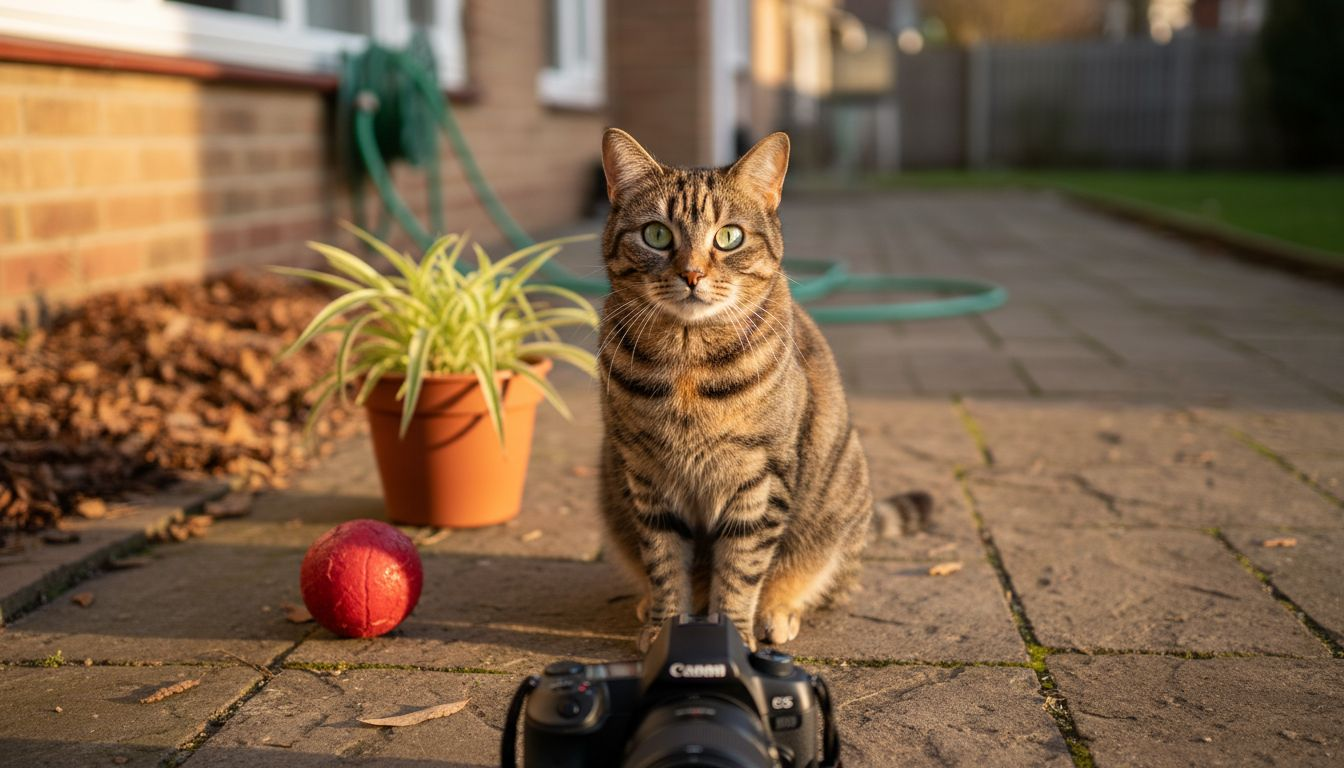
If your pet is moving around, which most pets will do, switch to continuous autofocus mode on your camera. This allows the camera to track your pet as they shift position, keeping the eyes locked in sharp focus even when they’re not sitting perfectly still. Some cameras offer back-button focus, where you use a dedicated button on the rear of the camera rather than the shutter button to control focus. This technique gives you finer control and lets you recompose without accidentally refocusing. Frame your shot tightly around the head and shoulders rather than pulling back to show the entire body. This tight framing highlights emotional expression and personality, making the portrait striking and memorable. You’ll want to anticipate your pet’s natural expressions and movements, ready to capture the moment when they look directly at the camera with alert, genuine engagement. Patience and multiple shots are your friends here. Take dozens of images, because one will inevitably be sharper and more emotionally compelling than the others. When you’re preparing your best shots for custom portrait artwork, those images with perfectly sharp eyes and engaging expressions give artists the strongest foundation to create stunning pieces that capture your pet’s true personality.
This table highlights essential camera settings and techniques to capture your pet’s best expressions:
| Technique | Purpose | Effect on Portrait Quality |
|---|---|---|
| Eye-Level Shooting | Builds intimacy | Strong emotional connection |
| Continuous Autofocus | Tracks moving pets | Maintains sharp focus on eyes |
| Burst Mode | Captures multiple moments | Increases chance of perfect shot |
| Wide Aperture (f2.8) | Softly blurs background | Emphasises pet’s face and expression |
Professional tip Take at least 20 to 30 shots during your session, focusing entirely on eye sharpness and expression rather than worrying about perfect body position, as a compelling eye connection matters far more than a perfectly posed body.
Step 4: Capture multiple moments using clever techniques
One perfectly sharp image rarely emerges from a single click. The secret to consistent success is capturing numerous moments throughout your session, then selecting the absolute best ones. This approach removes pressure, increases your odds of getting something truly special, and gives artists working on custom portraits multiple reference images to draw inspiration from.
Start by enabling burst mode or continuous shooting mode on your camera. This setting allows you to capture multiple frames with a single press of the shutter button, perfect for those unpredictable moments when your pet glances at the camera with genuine engagement. A quick burst of 5 to 10 shots dramatically increases your chances of catching a perfect expression, because at least one frame will have ideal eye contact combined with alert ears or a relaxed posture. Using burst mode captures fleeting expressions and quick movements, ensuring you don’t miss those decisive moments. If you’re using a smartphone, most modern devices offer burst mode too by holding down the shutter button. Beyond technical settings, use toys or sounds to prompt engaging moments. A squeaky toy, the crinkle of a treat bag, or even your own voice can draw your pet’s attention and create alert, interested expressions. Vary your angles and compositions throughout the session. Take some close-ups focusing on the face, some wider shots showing context and environment, and some from different heights. This variety ensures you’ll have options when selecting images later.
Mixing different angles and perspectives increases the variety of interesting photos during your shoot, giving you a diverse portfolio to choose from. Move around your pet rather than staying in one spot. Shoot from slightly above, slightly below, directly at eye level, and from the sides. Each angle reveals different aspects of your pet’s character and expression. Be patient with the process. Expect to take 50 to 100 shots during a solid session, knowing that perhaps 2 or 3 will be genuinely exceptional. This isn’t wasteful, it’s intelligent. Professional photographers shoot the same way, understanding that volume increases the probability of capturing something remarkable. Once you’ve amassed a collection of images, review them on your camera or computer screen, not just the tiny preview on your back display. Select your sharpest, most engaging shots, those where your pet looks genuinely present and connected. When you’re preparing these best images for custom portrait artwork, having captured dozens of moments gives artists the richest reference material, allowing them to blend the best expressions and poses into a truly exceptional final piece.
Professional tip Enable burst mode and take at least 80 to 100 shots during each session, reviewing them afterwards on a larger screen to identify your three to five strongest images with the sharpest focus and most engaging expressions.
Step 5: Review and select the best photos for portraits
Now comes the rewarding part. You’ve captured dozens of images, and somewhere in that collection are the gems that will become stunning family portraits. This step separates the keepers from the rest, and doing it thoughtfully ensures artists have the strongest possible reference material to work from.
Start your review process by culling ruthlessly. Transfer all your images to your computer or tablet, then view them at full size rather than on your camera’s tiny back screen. Go through and eliminate the obvious failures: shots where your pet’s eyes are closed, images that are severely out of focus, or frames where the composition is awkward. This initial pass removes perhaps 50 per cent of your images without much thought. Next, examine the remaining shots more carefully. Pay attention to sharpness, focus on the eyes, and overall lighting quality as these elements form the foundation of a compelling portrait. Look at expressions too. Does your pet look engaged, relaxed, or genuinely connected with the camera? An exceptional image combines technical sharpness with emotional authenticity. You might find five or six images that are technically sound but only one or two that truly capture your pet’s personality and charm.
Use rating systems if your photo software supports them. Many programmes allow you to mark images with stars or flags, making it easy to identify your top choices. Comparing images side by side highlights differences in sharpness and exposure, helping you make objective decisions between similar shots. View your selected images in different lighting conditions and on different screens. What looks perfect on your laptop might look different on a mobile phone or when printed. This thorough review ensures your final selections genuinely shine in all viewing scenarios. Once you’ve narrowed your collection down to perhaps three to five outstanding images, you’re ready to share them with artists preparing your custom portraits. These selected shots should demonstrate various angles, expressions, and moods of your pet, giving artists multiple reference points to blend into a truly exceptional final piece. The investment of time in careful selection transforms good reference material into great reference material, and that difference shows in the finished artwork.
Professional tip View your top candidate images on at least two different screens and in varying light conditions before finalising your selection, as this ensures they’ll translate beautifully regardless of where your finished portrait is displayed.
Turn Your Pet’s Best Photo Moments into Timeless Portraits
Capturing stunning pet photos is only the first step towards preserving your beloved companion’s unique character and spirit. Whether you have mastered finding the ideal lighting or focused on sharp engaging eyes as the article recommends, deciding how to showcase your pet’s personality in a lasting way can feel challenging. Many pet owners struggle to translate those perfect shots into artworks that celebrate their furry friend’s true essence.
Don’t let your precious images stay hidden in your photo library. Transform your favourite shots into custom pet portraits that keep memories alive for years to come. Visit The Family Portrait Companys to explore how professional artists use your photos to craft heartfelt portraits.
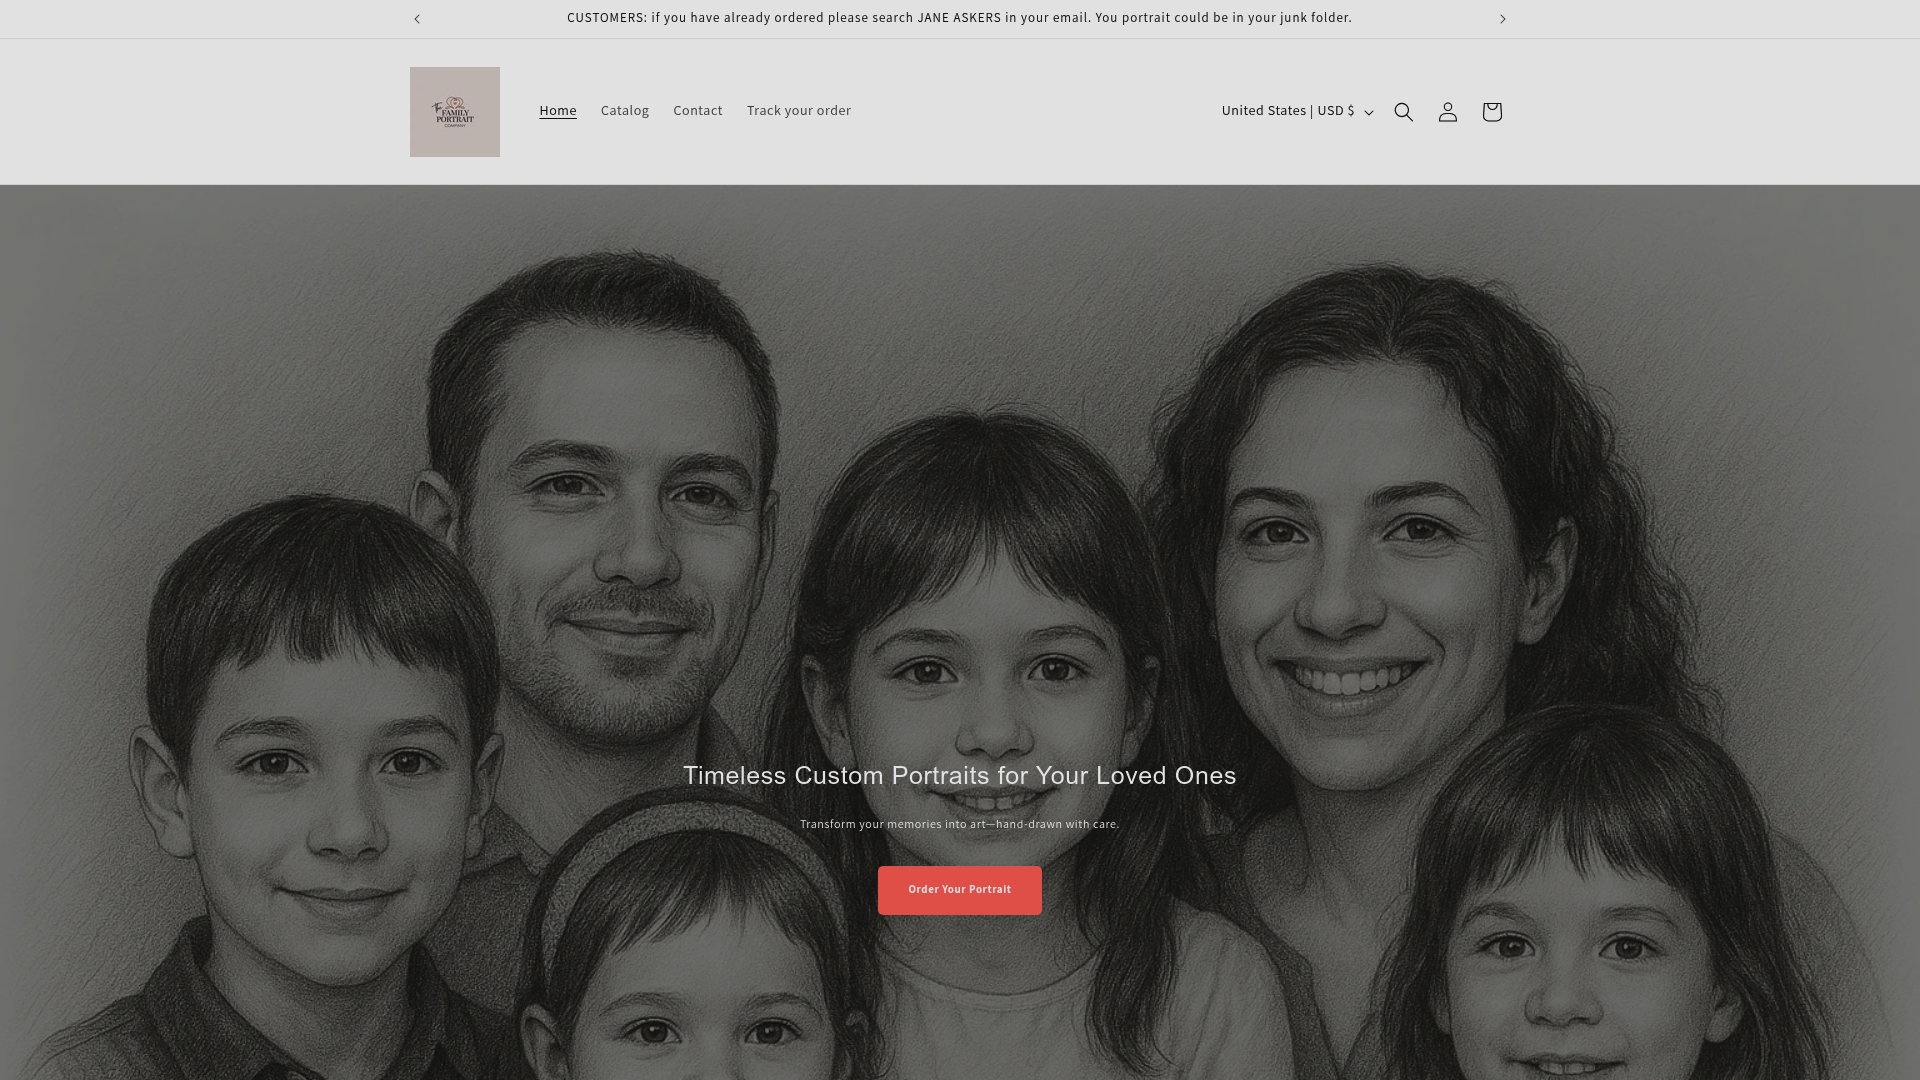
Ready to elevate your pet photos to stunning wall art that captures their charm and warmth? Head over to our main site and discover options for personalised portraits designed from your very own photographs. With expert craftsmanship and a passion for pets, our artists bring those perfect moments into breathtaking keepsakes. Start your journey now to celebrate your pet with art as timeless as your bond.
Frequently Asked Questions
What is the best lighting for pet photography?
Choosing natural light, especially during the early morning or late afternoon, provides soft, flattering tones ideal for pet portraits. Position your pet near a window or outdoors on an overcast day to avoid harsh shadows and direct sunlight.
How can I help my pet feel relaxed during a photo session?
Create a calm environment and allow your pet to explore the setup before photographing. Use treats and familiar toys to encourage positive associations, and keep the session short, aiming for 15 to 20 minutes.
What angle should I use when photographing my pet?
Position your camera at your pet’s eye level to create an intimate connection in the portrait. This perspective engages viewers more effectively and highlights your pet’s personality.
How can I capture multiple great moments during the shoot?
Use burst mode on your camera to take several shots quickly, improving your chances of catching ideal expressions and movements. Aim to capture 80 to 100 images during a session to ensure you have plenty of options.
What should I look for when selecting the best photos for portraits?
Focus on images where your pet’s eyes are sharp and the overall expression is engaging. Review your photos closely and select a few that showcase different angles and moods to provide a rich reference for artists creating custom portraits.
How many photos should I take to ensure quality portraits?
Aim to capture at least 80 to 100 shots during your pet’s photo session. This high volume increases the likelihood of finding three to five standout images that perfectly capture your pet’s personality and charm.
Recommended
- 7 Easy Pet Portrait Ideas Families and Owners Will Love – The Family Portrait Companys
- 7 Creative At Home Family Picture Ideas for Pet Owners – The Family Portrait Companys
- 7 Creative Ways for Family Photo Inspiration with Pets – The Family Portrait Companys
- How to Prepare Portrait Photos for Custom Pet Art – The Family Portrait Companys