
How to Prepare Photos for Portraits: A Practical Guide
Selecting the wrong photo is the number one reason custom British pet portraits fall flat, yet most owners overlook simple fixes that make a world of difference. A clear, thoughtfully prepared image helps artists capture every whisker, wag, and soulful glance, making the finished piece truly meaningful. This guide reveals how to choose the ideal setting, find flattering lighting, and position your British pet for the most striking results.
Table of Contents
- Step 1: Choose The Right Setting And Lighting
- Step 2: Position Your Pet For Optimum Visibility
- Step 3: Capture And Select The Sharpest Shots
- Step 4: Edit And Enhance Photos For Clarity
- Step 5: Verify Image Quality Before Sending
Quick Summary
| Essential Insight | Clarification |
|---|---|
| 1. Choose optimal lighting conditions | Soft, diffused light is crucial for flattering portraits; avoid harsh direct light for better skin tone representation. |
| 2. Position your pet effectively | Aim to capture natural poses that showcase your pet’s personality; photograph from their eye level for intimacy. |
| 3. Capture sharp images | Focus on your pet’s eyes and ensure clarity in fur details for emotional depth and connection in portraits. |
| 4. Edit thoughtfully for authenticity | Enhance basic details like brightness and sharpness while retaining the natural look of your pet’s features. |
| 5. Perform a final quality check | Verify resolution, colour accuracy, and absence of distractions to ensure a professional-quality portrait before submission. |
Step 1: Choose the Right Setting and Lighting
Selecting the ideal setting and lighting for your portrait is crucial to capturing your subject’s essence and creating a memorable image. Great portraits aren’t just about pointing a camera they require thoughtful preparation and understanding of how environment influences the final result.
When considering your portrait setting, you’ll want to evaluate both natural and controlled environments. The National Portrait Gallery’s collection highlights how strategic background selection can profoundly impact a portrait’s mood and narrative. Studio spaces offer complete lighting control with professional backdrops and equipment, while natural settings like gardens, parks, or home environments provide organic contexts that reveal more about the subject’s personality.
Lighting plays an equally pivotal role in portrait photography. Professional photographers understand that soft, diffused light creates gentle shadows and flattering skin tones, whereas harsh direct light can create unflattering contrast. Consider positioning your subject near large windows for beautiful natural illumination, or use soft box lighting in studio settings to achieve consistent, even coverage. The National Trust’s historical photography collections demonstrate how masterful light manipulation can transform an ordinary portrait into an extraordinary visual narrative.
Here is a comparison of natural and controlled portrait settings to help you choose the best environment:
| Aspect | Natural Setting | Studio Setting |
|---|---|---|
| Lighting Control | Changes with weather and time | Fully adjustable with equipment |
| Background Options | Organic, location-specific scenery | Professional backdrops, customisable look |
| Subject Comfort | Familiar for pets, lower stress | Controlled but may feel less natural |
| Preparation Needed | Consider weather and distractions | Set up lights and backgrounds in advance |
Expert Recommendation: Experiment with multiple lighting setups and locations before your final shoot to discover the most flattering angles and environments for your subject.
Step 2: Position Your Pet for Optimum Visibility
Preparing your pet for a perfect portrait requires strategic positioning that highlights their unique personality and physical characteristics. Understanding how to pose your furry friend will dramatically improve the quality and emotional impact of your final image.
The National Portrait Gallery’s guidance on portrait positioning offers crucial insights into creating compelling visual compositions. When positioning your pet, aim to capture their natural essence rather than forcing an unnatural stance. For dogs, this might mean capturing them in a relaxed sitting position or mid play. Cats often photograph best when perched or lounging in their favourite spot. Consider your pet’s typical postures and environments that make them feel most comfortable.
Lighting and angle are equally important when positioning your subject. Photograph from your pet’s eye level to create an intimate connection, and seek out soft natural light that illuminates their features without creating harsh shadows. The Gallery’s exploration of portrait techniques emphasises how careful positioning can transform an ordinary snapshot into a meaningful visual narrative. Experiment with multiple positions and observe how slight adjustments can dramatically change the portrait’s mood and emotional resonance.
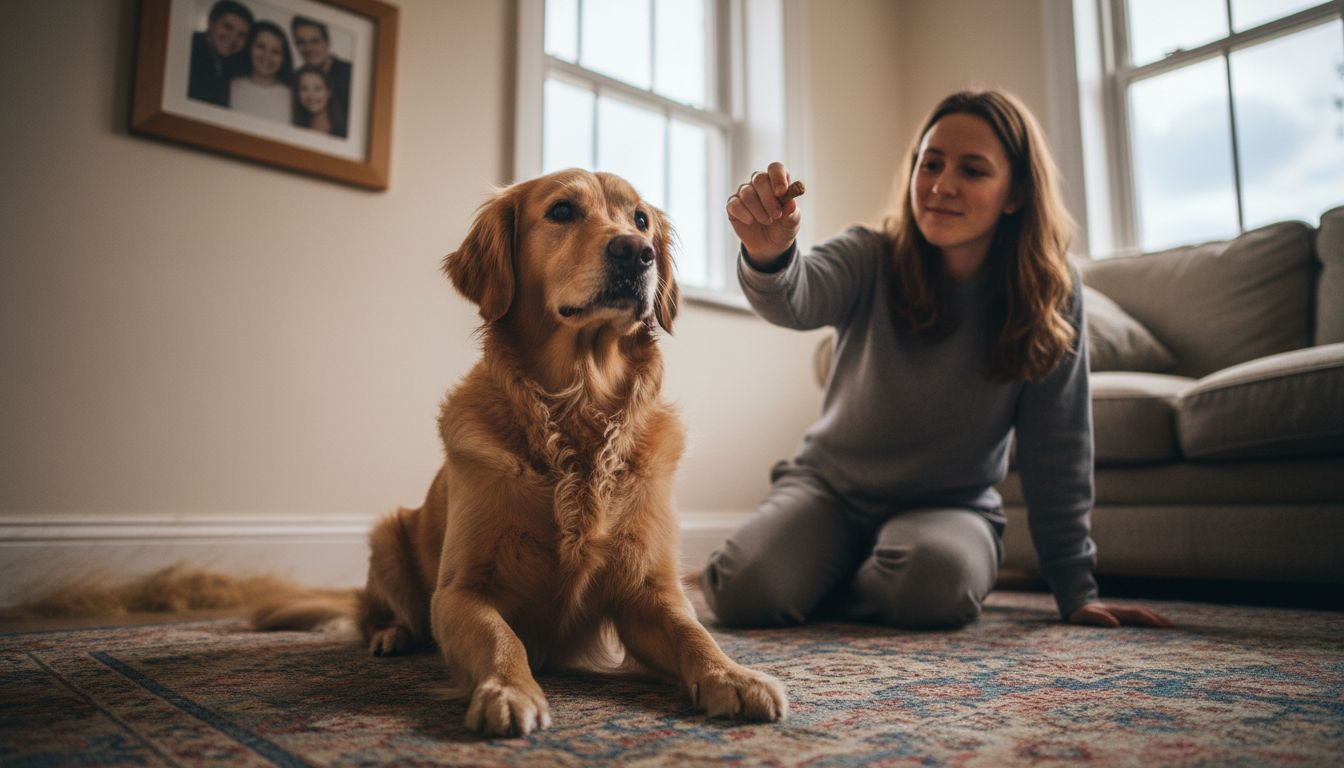
Expert Recommendation: Keep treats and patience close at hand while photographing pets, as capturing their most authentic pose often requires multiple gentle attempts and positive reinforcement.
Step 3: Capture and Select the Sharpest Shots
Crafting the perfect portrait requires more than just pointing a camera your goal is to capture images that reveal your pet’s true character with crisp, clear precision. Understanding how to technically evaluate and select the sharpest photographs will transform your final portrait from ordinary to extraordinary.
The National Portrait Gallery’s analytical approach to portrait selection provides crucial insights into identifying technically superior images. When reviewing your shots, focus on several key technical aspects. Look for images with pin sharp focus directly on your pet’s eyes a critical element that creates emotional connection. Examine each photograph for clarity checking that fur details are distinct and facial expressions are well defined. Avoid images with motion blur or soft edges that diminish the portrait’s impact.
Technical skill meets artistic vision when selecting portrait shots. Assess the overall composition alongside technical sharpness searching for images that balance precise focus with compelling emotional storytelling. AccessArt’s portrait resources emphasise the importance of structured experimentation in capturing expressive portraits. Consider shooting multiple frames in quick succession to increase your chances of capturing that perfect moment where technical precision meets genuine personality.
Expert Recommendation: Use your camera’s burst mode and review images on a large screen to accurately assess sharpness and detail, rather than relying on small camera or phone displays.
Step 4: Edit and Enhance Photos for Clarity
Transforming a good photograph into an exceptional portrait requires strategic editing that accentuates your pet’s unique qualities while maintaining natural authenticity. Your editing process will bridge the gap between technical precision and emotional storytelling.
The National Portrait Gallery’s analysis techniques provide sophisticated guidance for refining portrait images. When editing, start by adjusting basic parameters like brightness and contrast to reveal subtle fur textures and facial details. Carefully remove distracting background elements without losing the image’s organic feel. Focus on enhancing your pet’s eyes subtle adjustments in clarity and sharpness can dramatically increase the portrait’s emotional impact.
Professional editing is about subtle refinement rather than dramatic transformation. Historical portrait analysis resources highlight the importance of maintaining image integrity during enhancement. Use editing tools sparingly warm white balance to bring out natural colouration, gently smooth out noise or graininess, and subtly sharpen key details. Your goal is to create a portrait that looks beautifully polished yet completely authentic to your pet’s true appearance.
Expert Recommendation: Work with editing software that offers non destructive adjustments allowing you to experiment without permanently altering your original photograph.
Step 5: Verify Image Quality Before Sending
Before submitting your cherished pet portrait, a meticulous final review ensures your image meets professional standards and captures your furry friend’s true essence. This crucial verification step prevents potential disappointment and guarantees a stunning result.
The UK Passport Photo guidelines provide an excellent framework for assessing image technical quality. Carefully examine your portrait for several key elements first check image resolution ensuring crisp clarity with no pixelation or blurriness. Verify colour accuracy confirming that your pet’s true coat tone and natural colouration are faithfully represented. Look critically at background uniformity checking for any distracting shadows or uneven tones that might detract from your pet’s image.
Technical precision meets artistic integrity during this verification process. Government photo requirements outline comprehensive standards for portrait image submission. Zoom into key details particularly around your pet’s eyes and facial features ensuring sharpness and focus are maintained. Check for any digital artefacts noise or graininess that could compromise image quality. Assess overall composition confirming that your pet is centrally positioned with adequate surrounding space for potential cropping or framing.
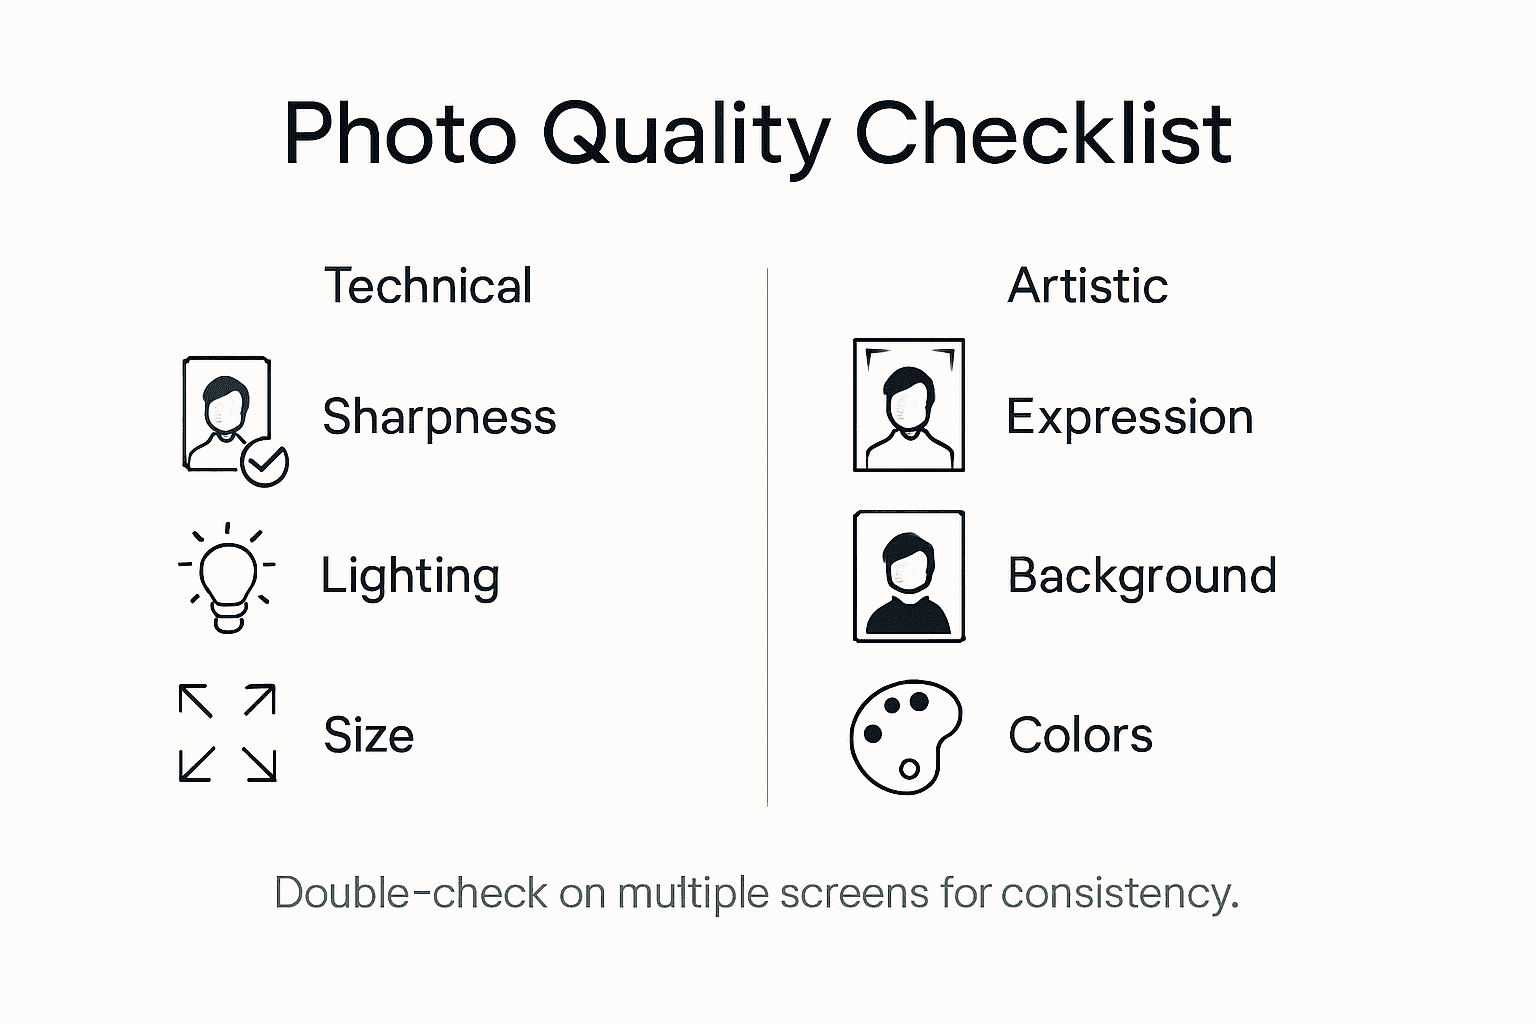
Use this table to quickly review essential checks before sending your final pet portrait:
| Checkpoint | What to Look For | Why It Matters |
|---|---|---|
| Resolution | Crisp details, no pixelation | Ensures quality for printing and sharing |
| Colour Accuracy | True to natural fur tones | Represents pet’s authentic appearance |
| Background Uniformity | No distractions, even tone | Keeps focus on your pet |
| Sharpness | Focused eyes and expressions | Enhances emotional connection |
| Absence of Artefacts | No noise or graininess | Prevents degradation of image quality |
Expert Recommendation: Review your image on multiple devices and screen sizes to ensure consistent quality and representation across different viewing platforms.
Bring Your Perfect Portrait Vision to Life with The Family Portrait Company
Preparing your photos for a stunning portrait can feel overwhelming when you aim for the ideal setting, sharpness, and emotional connection. This guide highlights challenges like capturing natural lighting, positioning pets comfortably, and verifying image quality before sending. If you want to turn your meticulously prepared photographs into a beautiful custom portrait that truly reflects your loved ones’ unique character, we are here to help.
Experience the difference by choosing our Home page – The Family Portrait Company where expert craftsmanship meets your attention to detail.

Take the next step today by uploading your perfectly prepared images to our website and discover how effortless it can be to transform your cherished photos into timeless custom pet or human portraits. Your unforgettable portrait journey starts here.
Frequently Asked Questions
How do I choose the best setting for pet portraits?
To choose the best setting for pet portraits, consider both natural environments and studio spaces. Experiment with locations like parks or your home and evaluate the lighting conditions to find a backdrop that complements your pet’s personality.
What lighting is best for capturing pet portraits?
Soft, diffused light is best for capturing pet portraits as it creates gentle shadows and flattering skin tones. Position your pet near large windows or use soft box lighting to achieve even illumination and avoid harsh contrasts.
How can I ensure my pet is posed effectively for portraits?
To pose your pet effectively for portraits, capture them in a natural stance, such as sitting relaxed or playing. Observe their typical postures and choose positions that highlight their unique personality while making them feel comfortable.
What technical elements should I look for when selecting pet portrait shots?
When selecting pet portrait shots, focus on sharpness, particularly around the eyes, and ensure there is no motion blur. Review images for distinct fur details and clear facial expressions to maintain an emotional connection in the portrait.
What editing techniques should I use to enhance pet portraits?
Enhance pet portraits by adjusting brightness and contrast to reveal fur textures and facial features while maintaining a natural look. Use subtle adjustments, such as sharpening eyes and smoothing noise, to create a polished final image without sacrificing authenticity.
How do I verify the quality of my portrait before sharing it?
Verify the quality of your portrait by checking for image resolution, colour accuracy, sharpness, and the absence of digital artefacts. Review each detail closely and ensure the overall composition is centred with adequate surrounding space, confirming a professional standard before sharing.
Recommended
- Choosing the Best Portrait Photo for Stunning Results – The Family Portrait Companys
- Ensuring Photo Quality for Portraits: A Family Approach – The Family Portrait Companys
- Portrait Photo Preparation for Custom Family and Pet Art – The Family Portrait Companys
- What Is Portrait Editing? Complete Guide for Families – The Family Portrait Companys